How to Resize an Image in Paint 3D Without Losing Quality (2026)
Sometimes you need to change the resolution or the image size for your project or personal use. Some tools turned your photo blurry, stretched it, or lowered the image quality. Most people make one small mistake that destroys the image quality without resizing. You need a professional tool with a beginner-friendly interface.
There are many offline and online tools, but if you’re using Windows 10 or Windows 11, you can resize images with Paint 3D without losing sharpness. In this article, I’ll guide you through the exact method I use every day to resize images for social media, websites, and even printing.
What Happens When You Resize an Image?
Before resize an image in paint 3d make it sure,
- Reducing size (downscaling) → keeps quality almost the same with size reduce
- Increasing size (upscaling) → do blur and pixelation
- Because when you enlarge an image, the MS paint 3D software has to set new pixels.
Step-by-Step: Resize Image in Paint 3D
Follow these below simple steps:
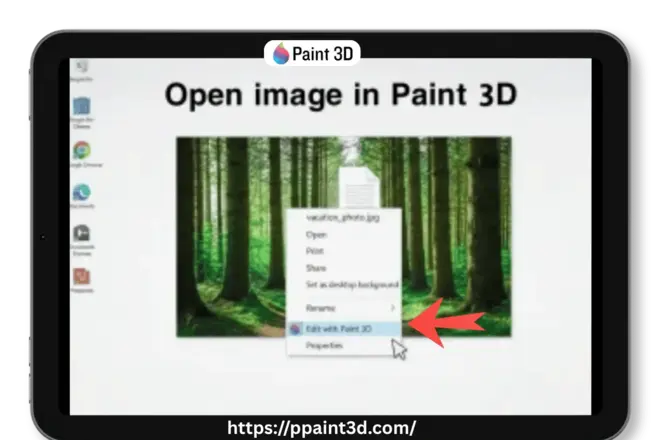
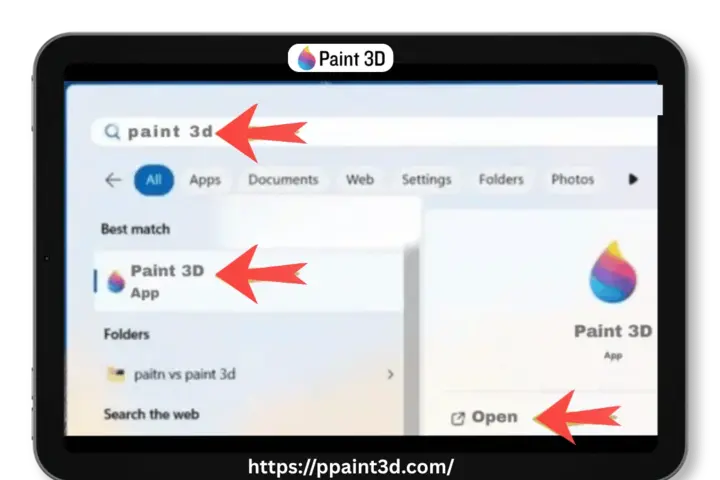
Step 1: Open Image
- Right-click your image
- Click Edit with Paint 3D.
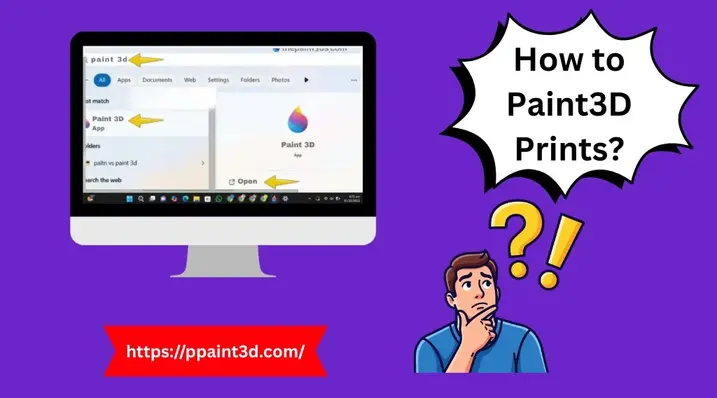
- Or you can open the start menu on your computer and type pain3d in search bar. You can also see from below pic:
Step 2: Open Canvas Settings
- Now see canvas menu from top bar and click on it. Click
- Or you can give command Alt + C.

Step 3: Check Important Options
Make sure below options are On from right side bar:
✔ Check Resize image with canvas
✔ Lock aspect ratio
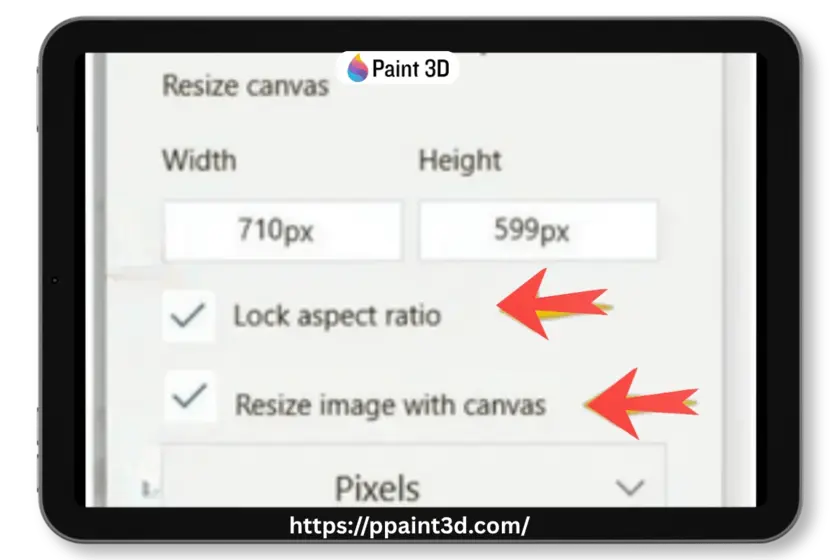
👉 These are the most important settings.
Step 4: Choose Resize Mode
You have 2 options here.
- Select Pixels (recommended) from box
- Avoid percentage unless needed

Step 5: Enter Size
- Adjust your required size whatever you want to make.
Step 6: Save Image
- Press Ctrl + S
- Or use Ctrl + Shift + S to save a copy
Pixels vs Percentage (Which Is Better?)
Pixels
- Exact size (e.g., 1080 × 1080).
- Its is best for social media & websites.
Percentage
- It is relevant when size is not exact.
- Not accurate for real use.
👉 Pro Tip: Always use pixels for better control.
Best Image Sizes (SEO + Social Media Ready)
Use these standard sizes:
Social Media
- Instagram Post: 1080 × 1080
- Instagram Story: 1080 × 1920
- YouTube Thumbnail: 1280 × 720
- Facebook Image: 1200 × 630
Website Images
- Blog images: 800–1200 px width
- Thumbnails: 300–400 px
- Hero images: 1920 × 1080
Printing (High Quality)
- 4×6: 1200 × 1800 px
- 8×10: 2400 × 3000 px
Why Aspect Ratio Is Important?
Aspect ratio = shape of your image.
If you don’t lock it:
- Image becomes stretched
- Faces look distorted
If you lock it:
- Image look natural and balanced.
👉 Always keep “Lock aspect ratio” ON
Time-Saving Shortcuts
If you are regular designer and want smooth work, you need to remember some shortcuts in Paint 3D. This will give you relief from mouse control.
- Alt + C → Open resize settings
- Ctrl + S → Save
- Ctrl + Shift + S → Save as copy
- Ctrl + Z → Undo
Resize Images in Paint 3D for Web, Social Media, and Printing
When you resize images, one important thing to understand is that every platform requires a different image size. If you use the wrong dimensions, your image will look cropped, stretched, or low quality. To make things easy, here are the most commonly used image sizes.
Social Media Image Sizes
Below are the different sizes for Instagram, Facebook, and YouTube.
| Platform | Image Type | Dimensions (Pixels) |
|---|---|---|
| Square Post | 1080 × 1080 | |
| Story | 1080 × 1920 | |
| Cover Photo | 820 × 312 | |
| Shared Image | 1200 × 630 | |
| Twitter/X | Header | 1500 × 500 |
| Twitter/X | Post Image | 1200 × 675 |
| Post Image | 1200 × 627 | |
| YouTube | Thumbnail | 1280 × 720 |
Image Sizes for Websites
For websites, image size is about for loading speed and SEO.
| Usage | Recommended Size |
|---|---|
| Blog Images | 800 – 1200 px width |
| Header Images | 1920 × 1080 |
| Thumbnails | 300 – 400 px width |
| Email Images | Max 600 px width |
Image Sizes for Printing (300 DPI)
Printing requires high-resolution images. If the image is too small, it will look blurry when printed.
| Print Size | Dimensions (Pixels) |
|---|---|
| 4 × 6 inch | 1200 × 1800 |
| 5 × 7 inch | 1500 × 2100 |
| 8 × 10 inch | 2400 × 3000 |
👉 Important: You cannot fix low-quality images by increasing size in Paint 3D. Always start with a high-resolution image for printing.
5 Common Mistakes to Avoid
- Not checking “Resize image with canvas”
- Unlocking aspect ratio
- Enlarging small images
- Using percentage instead of pixels
- Overwriting original image
Pro Tips for Best Quality
- Always resize smaller, not big images.
- Keep a backup of your real images.
- Use JPEG format for smaller file size
- For enlarging, better to use AI tools instead.
When Paint 3D Is Not Enough?
Paint 3D is great for:
- Quick resizing
- Social media images
- Basic editing
But not ideal for:
- Bulk resizing
- High-end editing
- AI upscaling
Conclusion
Resize an image in Paint 3D is easy once you know the right method.
Just remember:
- Use pixels accuracy
- Keep aspect ratio locked
- Avoid enlarging images
Follow these simple steps for resize an image in paint 3d, and your images will stay sharp, clean, and professional every time.
FAQ
How do I resize an image in Paint 3D without losing quality?
Resize the image smaller, use pixels, and keep aspect ratio locked.
Why does my image look blurry after resizing?
Because you enlarged it beyond original size.
Pixels or percentage which is better?
Pixels are more accurate and recommended.
Can I resize multiple images in Paint 3D?
No, it only supports one image at a time.
Does reducing image size affect quality?
Very slightly, but usually not noticeable.